| 일 | 월 | 화 | 수 | 목 | 금 | 토 |
|---|---|---|---|---|---|---|
| 1 | 2 | 3 | 4 | 5 | 6 | |
| 7 | 8 | 9 | 10 | 11 | 12 | 13 |
| 14 | 15 | 16 | 17 | 18 | 19 | 20 |
| 21 | 22 | 23 | 24 | 25 | 26 | 27 |
| 28 | 29 | 30 | 31 |
- 정처기 필기
- 정보처리기사
- 1인 게임 개발
- 1인 게임
- Unity
- 토이 프로젝트
- 게임제작
- 유니티3d
- Unity2D
- 프로그래머스 #최소힙 #우선순위 큐
- unity3d
- 유니티 3D
- Unity #Unity2D #Portal
- FPS
- 자바스크립트
- 정처기
- 게임
- 자바스크립트 게임
- portal
- 3회차
- 유니티
- Pong
- 필기
- 1인 개발
- Vampire Survivors
- 1인 게임 제작
- 게임 제작
- 게임 개발
- 합격
- 퐁
- Today
- Total
Coding Feature.
[Unity 3D] 3D 퐁 만들기 #1 Trello 이용 프로젝트 관리, Game Manager, Input Manager, 기본 Pong 매커니즘 구현 본문
[Unity 3D] 3D 퐁 만들기 #1 Trello 이용 프로젝트 관리, Game Manager, Input Manager, 기본 Pong 매커니즘 구현
codingfeature 2024. 1. 18. 20:36Unity2D는 몇 번 경험해보았지만 Unity3D로 게임을 만들어 본 경험이 없기 때문에 간단한 3D Pong 게임을 만들어보면서 익혀보기로 했습니다.
이번 게임은 "MICRO-PONG"으로 일단 이름을 지었습니다.
아래 게임과 유사한 방식으로 게임 플레이가 될 예정입니다.
https://www.youtube.com/watch?v=pgUtluRO9e0
다만 위보다는 좀더 세련되고 이펙트가 강한, 인상적인 네온 풍의 스피디한 게임을 만들 생각입니다.
사실 유니티 3D 경험도 쌓는 것도 있지만 유니티 이펙트 시스템을 아직 활용해본 적이 없어서 그 부분도 건들여보고 싶어서 이 프로젝트로 정했습니다.
그리고 지난번에 "micro-portal"을 만들면서 아쉬웠던 부분인 게임 매니저 스크립트 구현, Prefab 활용을 더 확실하게 해볼 예정입니다.
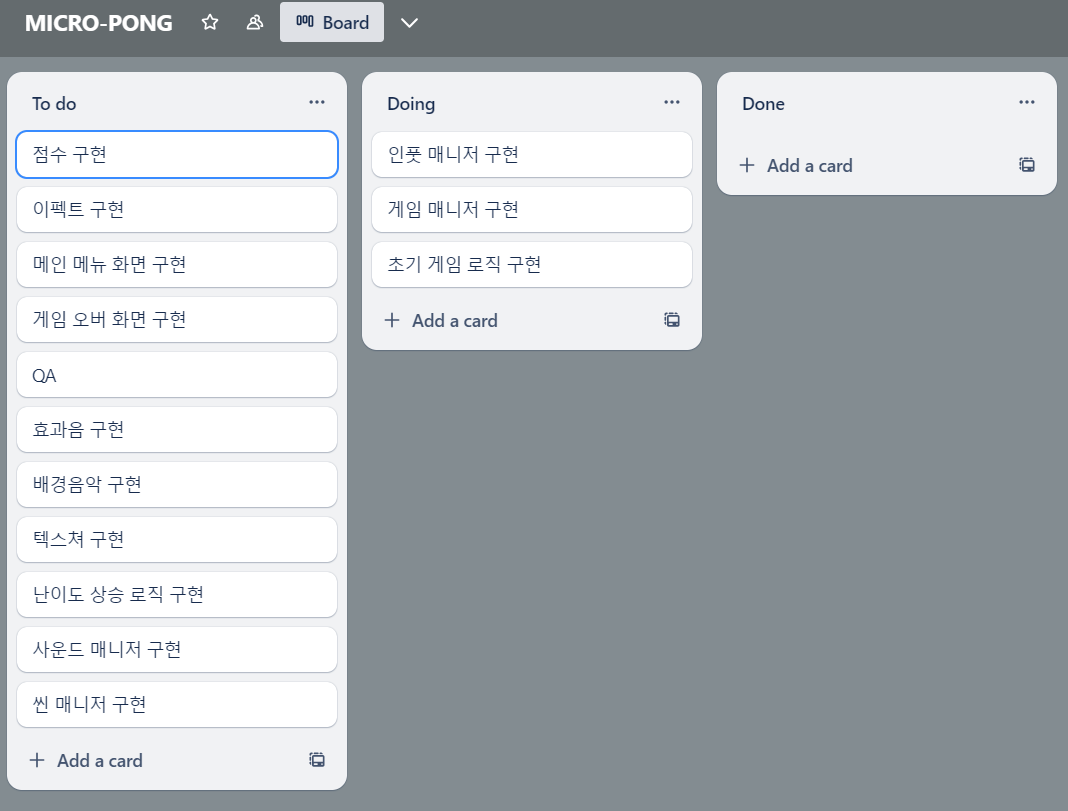
우선 게임 프로젝트을 보다 효율적으로 수행하기 위해 Trello 라는 사이트를 이용하기로 했습니다.
게임 프로그래머분들이 많이 활용하는 프로젝트 관리 사이트라고 합니다!
Manage Your Team’s Projects From Anywhere | Trello
Task management Use Trello to track, manage, complete, and bring tasks together like the pieces of a puzzle, and make your team’s projects a cohesive success every time.
trello.com

위와 같이 단순하게 일단 짜보았습니다.
인풋 매니저와 게임 매니저 그리고 초기 게임 로직은 모두 한꺼번에 진행될 예정입니다.
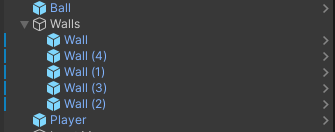
우선 Cube 게임 오브젝트와 Sphere 오브젝트를 사용해서 다음과 같이 게임 플레이 월드를 만들었습니다.


Player는 사용자가 조종하게 될 큐브입니다.
모든 게임 오브젝트에는 Collider 컴포넌트가 있고 Ball에는 RigidBody 컴포넌트를 추가하였습니다.
이제 Ball 게임 오브젝트에 다음과 같은 스크립트를 짜주었습니다.
using System.Collections;
using System.Collections.Generic;
using UnityEngine;

public class BallScript : MonoBehaviour
{
    public float ballSpeed;

    public Vector3 ballMovementVector;

    Rigidbody rb;
    private void Awake()
    {
        rb = GetComponent<Rigidbody>();
    }

    void Start()
    {

    }

    void Update()
    {
        transform.Translate(ballMovementVector.normalized * ballSpeed * Time.deltaTime);
    }

    private void OnCollisionEnter(Collision collision)
    {
        GameObject go = collision.gameObject;
        if (go.CompareTag("Wall") || go.CompareTag("Player")) // 부딪힌 면에 대한 방향 변환
        {
            if (go.transform.up.x < -0.01f || go.transform.up.x > 0.01f)
                ballMovementVector.x *= -1;
            else if (go.transform.up.y < -0.01f || go.transform.up.y > 0.01f)
                ballMovementVector.y *= -1;
            else if (go.transform.up.z < -0.01f || go.transform.up.z > 0.01f)
                ballMovementVector.z *= -1;
        }
    }
}
Ball 이 어떤 벡터 방향으로 움직이다가 벽 또는 플레이어에 닿았을 때 방향을 전환하도록 구현했습니다.
게임오브젝트.transform.up이 월드를 기준으로 평면에서부터 수직으로 올라가는 벡터입니다.
이때 if문의 조건문이 왜 != 0이 아니라 저렇게 부등호로 했냐하면,
어떤 경우에는 transform.up이 (0, 0, 1)이어도 x좌표나 y좌표가 완벽히 0이 아닌 것으로 조건문에서 처리되는 경우를 발견해서였습니다.
아마도 유니티에서 0으로 나와도 자료형의 차이로 완전히 0이 아닌, 조금 다른 값으로 인식이 되서 그런 것 같았기에 위와 같은 부등호를 섞은 조건문으로 처리했습니다.
그 다음 게임 매니저 스크립트를 작성했습니다.
using System.Collections;
using System.Collections.Generic;
using UnityEngine;

public class GameManager : MonoBehaviour
{
    private static GameManager instance;
    GameObject m_ball;

    public GameObject cube;

    public float initBallSpeed;
    public Vector3 m_initBallVector;

    public static GameManager Instance
    {
        get
        {
            return instance;
        }
    }

    private void Awake()
    {
        if (instance)
        {
            Destroy(instance);
            return;
        }

        instance = this;
        DontDestroyOnLoad(this.gameObject);

        m_ball = GameObject.Find("Ball");
    }
    void Start()
    {
        m_ball.GetComponent<BallScript>().ballSpeed = initBallSpeed;
        m_ball.GetComponent<BallScript>().ballMovementVector = m_initBallVector;
    }

    void Update()
    {
    }
}
인터넷에서 조금 찾아봤는데 위와 같이 게임 매니저를 싱글톤 패턴으로 작성하면 다른 스크립트에서 참조하기가 편하고 다양한 씬에서 활용이 가능하다고 하네요!
싱글톤 관련 디자인 패턴을 좀 더 찾아봐야겠네요.
위와 같이 게임 매니저에서 Ball의 시작 벡터, 그리고 속도를 제어할 수 있도록 작성했습니다.
이제 사용자가 마우스로 Player를 움직여서 공을 받을 수 있도록 스크립트를 짜야 합니다.
저는 Input Manager를 게임 매니저와 같이 싱글톤 패턴으로 작성했습니다.
using System.Collections;
using System.Collections.Generic;
using UnityEngine;

public class InputManager : MonoBehaviour
{
    private static InputManager instance;
    private GameObject player;

    public float mouseZ;
    public static InputManager Instance
    {
        get { return instance; }
    }
    private void Awake()
    {
        if (instance)
        {
            Destroy(instance);
            return;
        }

        instance = this;
        DontDestroyOnLoad(this.gameObject);

        player = GameObject.Find("Player");
    }

    void Start()
    {

    }
    void Update()
    {
        DragPlayer();
    }

    private void DragPlayer()
    {
        Vector3 mousePosition = new Vector3(Input.mousePosition.x, Input.mousePosition.y, mouseZ);
        Vector3 objectPosition = Camera.main.ScreenToWorldPoint(mousePosition);
        player.transform.position = new Vector3(objectPosition.x, objectPosition.y, player.transform.position.z);
    }
}
DragPlayer 함수는 우선 mousePosition 변수에 화면상의 마우스 position을 받습니다.
이때 Z 값은 mouseZ라는 public 변수를 통해 개발 도중 설정할 수 있도록 했습니다.
그리고 ScreenToWorldPoint 함수를 사용해서 Player의 position을 구한 뒤 위치를 변경시켰습니다.
Z 값은 카메라 평면으로부터의 거리로 설정하면 된다고 하네요!
그 다음 유니티에서 각 스크립트의 public 변수 값을 알맞게 설정하고 플레이해보았습니다.

그 다음은 점수 시스템과 난이도 상승 시스템을 구현해보도록 하겠습니다!
'Toy Project > MICRO-PONG [Unity3D]' 카테고리의 다른 글
| [Unity 3D] 3D 퐁 만들기 #6 네온 효과 위한 Material 제작, Post Processing, 스파크 효과(파티클 시스템) 구현 (0) | 2024.01.20 |
|---|---|
| [Unity 3D] 3D 퐁 만들기 #5 Audio Manager 구현, 효과음, 배경 음악 설정 (0) | 2024.01.20 |
| [Unity 3D] 3D 퐁 만들기 #4 마우스 커서 관련 처리, 공 랜덤화 구현(쿼터니언) (0) | 2024.01.19 |
| [Unity 3D] 3D 퐁 만들기 #3 UI 매니저(메인 메뉴, 게임 오버), 공 트레일 추가, 코드 리팩토링 (0) | 2024.01.19 |
| [Unity 3D] 3D 퐁 만들기 #2 점수 시스템, Scene 매니저, Ball 속도 상승 구현 (0) | 2024.01.18 |


